Jenkins
Automating software development process using Jenkins.
- Creating a VM using VirtualBox
- Installing Prerequisites
- Installing Jenkins
- Setting up Jenkins
- Pipelines in Jenkins
Creating a VM using VirtualBox
- First verify that the virtualization option is enabled. You can do that by going to the BIOS of your machine. Under security menu, you can see the Virtualization option. If it is disabled, enable it and start the machine.
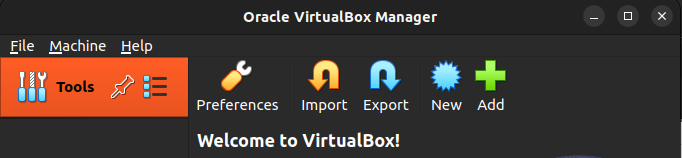
- Then download the Oracle Virtual Box software for your desired OS from Oracle Virtual Box and install the software.
- Next download the ISO image of the VM Operating System. For this, we used Ubuntu 22.04.5 lts (Download the Desktop image).
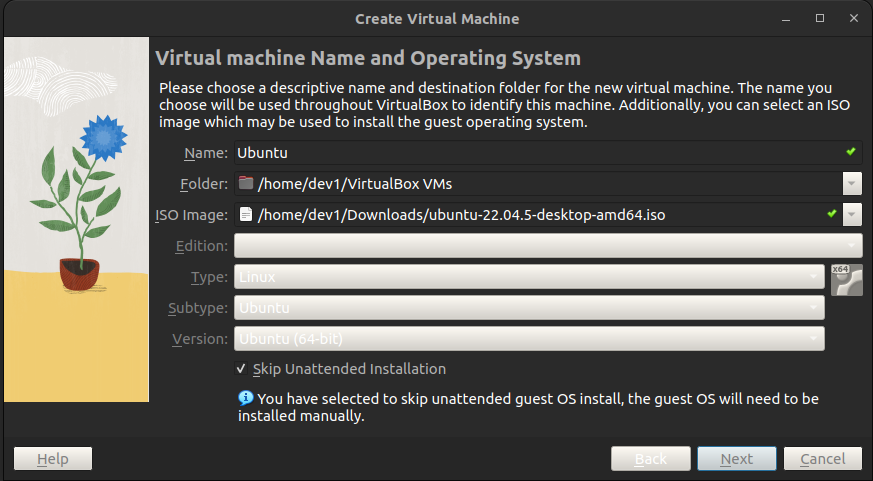
- After that, install the ISO using Oracle VirtualBox by clicking "New" button and selecting the downloaded ISO image.
Tick the checkbox with Skip Unattended installation. (Otherwise the terminal cannot be opened: This is an error with ubuntu 22.04 or virtualbox version.)
After clicking next you can select the Memory and no. of processors. Then install and create the virtual machine.
For further information refer this video: https://www.youtube.com/watch?v=nvdnQX9UkMY
Optional: Install guest additions (If skip unattended installation)
Guests Additions helps user to do tasks such as copy and paste from host-guest/ guest-host, resize the window size. It helps a lot when copying and transferring between guest and host. This gets installed automatically in the unattended installation. Since, it is skipped we have to install guest additions manually.
- To install guest additions. Log in to your VM and run the following commands.
$ sudo apt update$ sudo apt install -y build-essential linux-headers-$(uname -r)- After running above commands, go to Devices menu and click "Insert Guest Additions CD image".
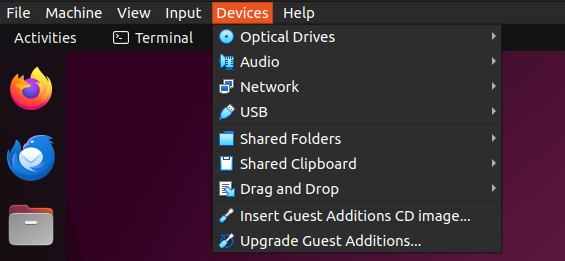
- It will mount a new ISO image like below. Click the CD icon. Then a folder opens.

- Open the terminal inside that folder and run the following command. This should run the "autorun.sh" file in that opened folder.
$ ./autorun.shAfter finish executing, restart the VM. Guests Additions will now be working!
Installing Prerequisites
Step 1: Install Java
Install java on the virtual machine using the following commands in the terminal.
- Search for OpenJDK.
$ sudo apt-cache search openjdk- install OpenJDK 17 using the APT package manager
$ sudo apt install openjdk-17-jdk -y- Once the installation is complete, verify the version of Java installed by running the command:
$ java -versionAfter running above command you should see something like this:

Step 1: Install Git

To install Git on your machine, run the following command.
$ sudo apt-get install gitAfter installing check if it is installed by running the following command.
$ git --versionInstalling Jenkins
Go to Jenkins official website and download Jenkins for Ubuntu/debian. https://www.jenkins.io/download/
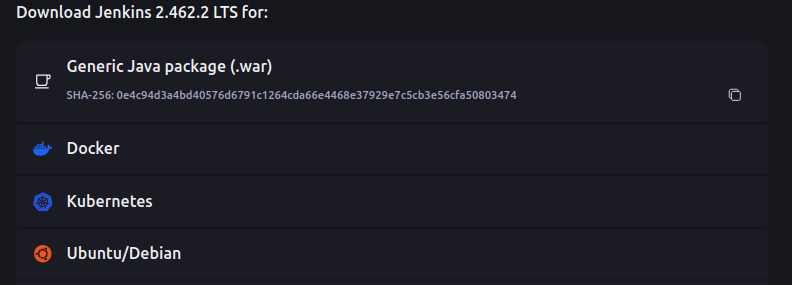
Then run the commands that is shown in the page. It should look something like below:
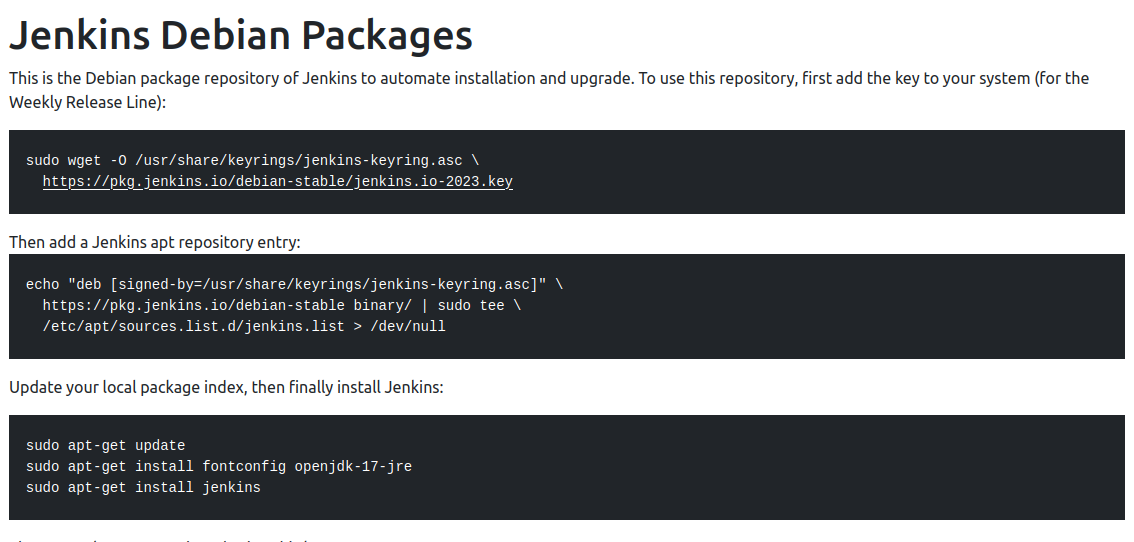
NOTE: Don't need to run the following command since java is already installed previously.
$ sudo apt-get install fontconfig openjdk-17-jreAfter successfully installing Jenkins, run the following command to start Jenkins.
$ sudo systemctl start jenkinsTo see if Jenkins is running, run the following command.
$ sudo systemctl status jenkinsThen you will get something like this:
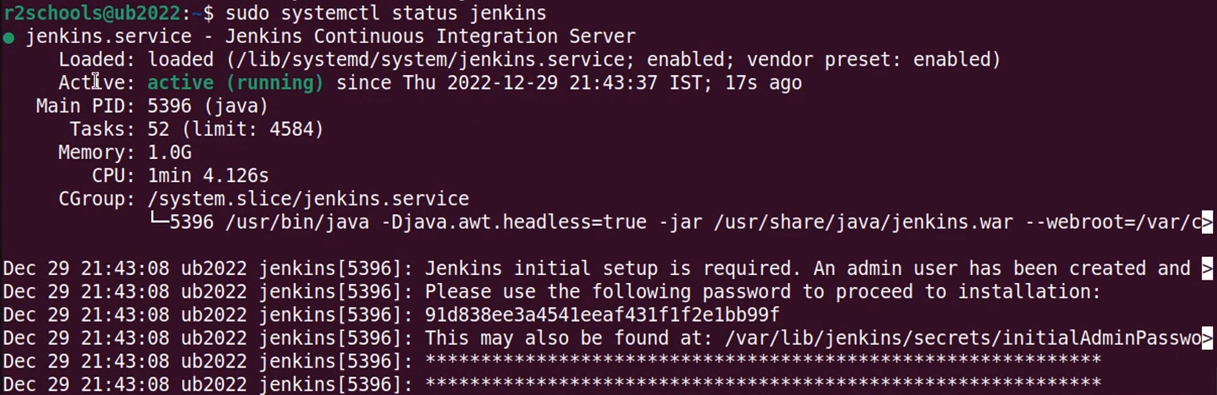
IMPORTANT: Copy the password from above, you will need it when setting up Jenkins.
Setting up Jenkins
- After running Jenkins and checking status, go to localhost:8080 (this is the default port that jenkins runs). You will see the following page:
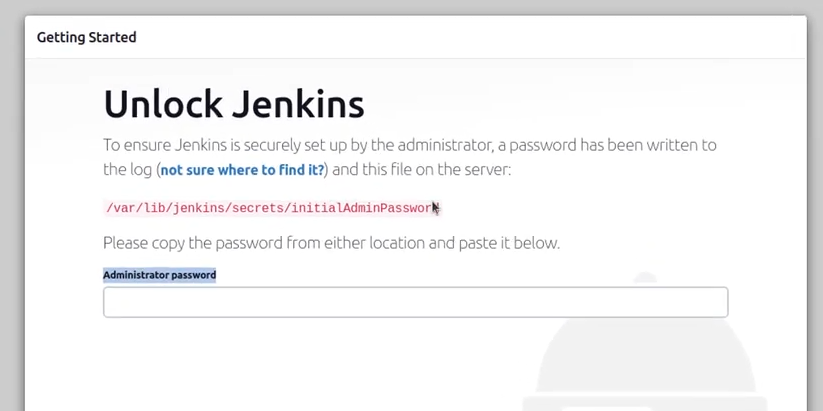
- paste the password you copied when checking the status and click continue.
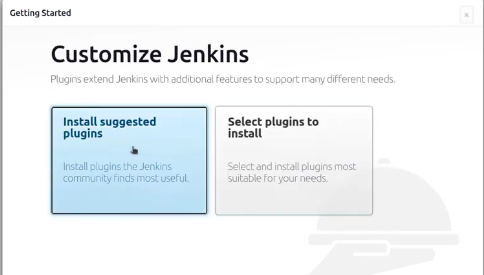
- Then proceed to install suggested plugins. It may take a few minutes.
- Then create an account. Enjoy Jenkins !
Pipelines in Jenkins
Jenkins Pipelines are a powerful way to automate the software development lifecycle by defining CI/CD workflows as code. They allow you to automate tasks like building, testing, and deploying applications in a structured, repeatable, and scalable manner. Pipelines provide visualization of the workflow stages, support complex scenarios with branching and parallel execution, integrate easily with other tools, and enhance consistency, reliability, and speed in the delivery process, reducing manual errors and increasing efficiency.
Creating a simple pipeline
To create a simple pipeline go to the repository directory and create a text file named "Jenkinsfile". Inside the file copy and paste the below groovy script. This is a simple groovy script which prints some statements in each stage of the build.
pipeline {
    agent any

    stages {
        stage('Build') {
            steps {
                echo 'Building the Application...'
            }
        }
        stage('Test') {
            steps {
                echo 'Testing the Application ...'
            }
        }
        stage('Deploy') {
            steps {
                echo 'Deploying the Application...'
            }
        }
    }
}
Now check status of jenkins using the following command.
$ sudo systemctl status jenkinsif it is active then go to jenkins running url (default is localhost:8080). if it is not active run the following command and start jenkins.
$ sudo systemctl start jenkins- After logging in go to Dashboard/ new item and create a multibranch pipeline.
- Click add source and paste the git url. (use this if you don't have one: https://github.com/ransika99lalco/my-app.git)
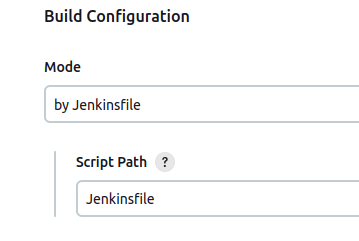
- Build configuration should look like below:
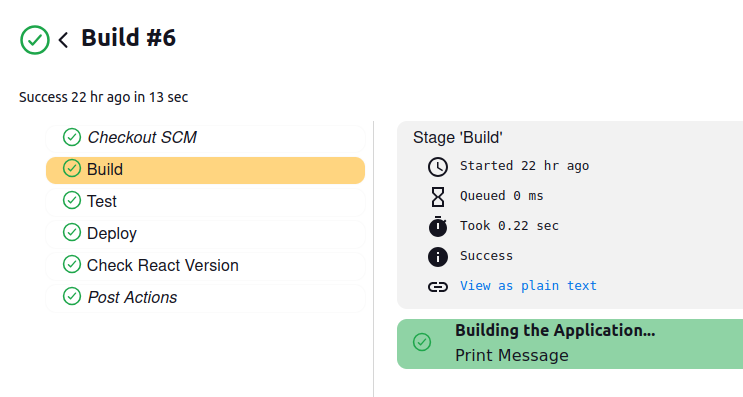
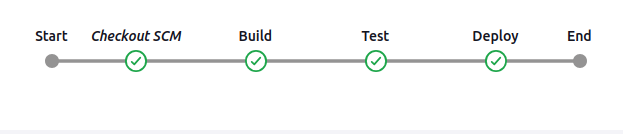
- Click save and run build. In the stages, you should see something like this.
- When you click on each stage you can see the print statements being printed as below.