Customers Screen
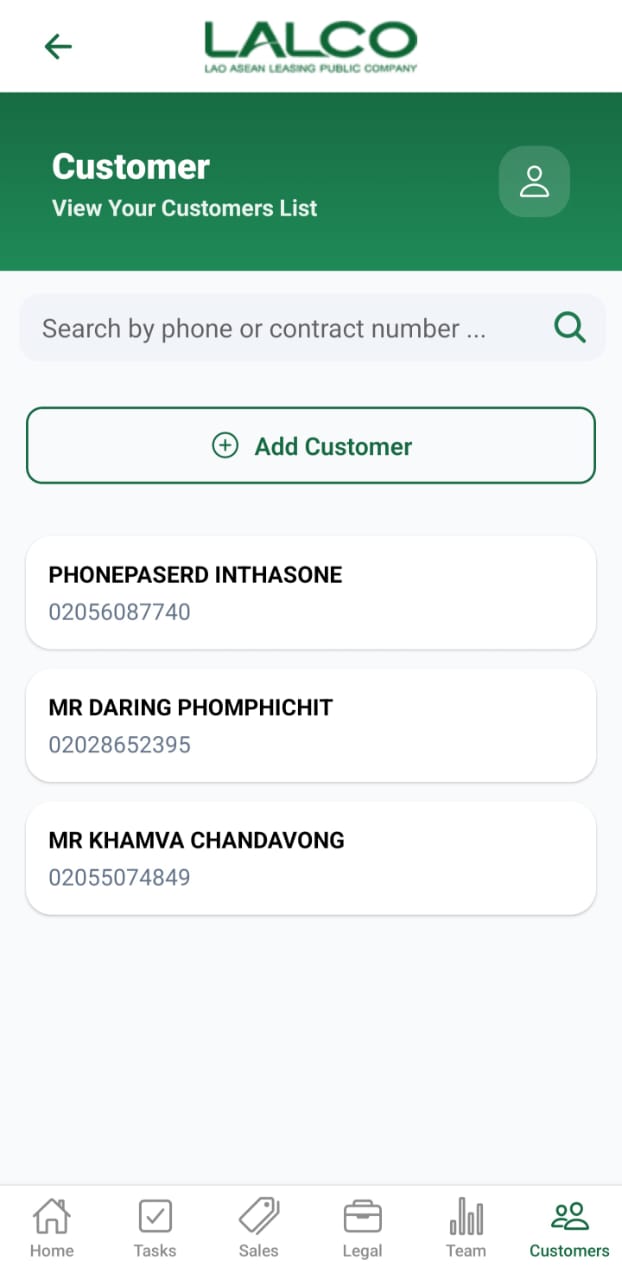
The Customers Screen allows staff to view and manage all customers in the system. It provides a searchable list, filter options, and quick access to customer details.
Header Section
Page Title
Customers
Description
View your customer list and manage customer records.
Action Icon ☰
May be used to:
-
Access settings
-
Open additional options
Search Function
Search Bar
Search by customer
Allows users to search by:
-
Customer Name
-
Phone Number
-
Contract Number
Filter Options
Users can filter customers by status:
-
All → Shows all customers
-
Active → Currently active customers
-
Pending → New or pending approval
-
Closed → Completed or closed accounts
Customer List
Each item represents a customer.
Example:
-
user – 02056087740 · Closed
Information Displayed
Each record shows:
-
Customer Name
-
Phone Number
-
Status
How to Use
View a Customer
-
Open the Customers tab
-
Browse or search the list
-
Tap a customer to view details
Add a Customer
-
Tap + Add Customer
-
Fill in required fields: Name, Phone, Address, Province → City → Village, NIC/Family Book, Birth Date
-
Tap Save
Customer Details Screen
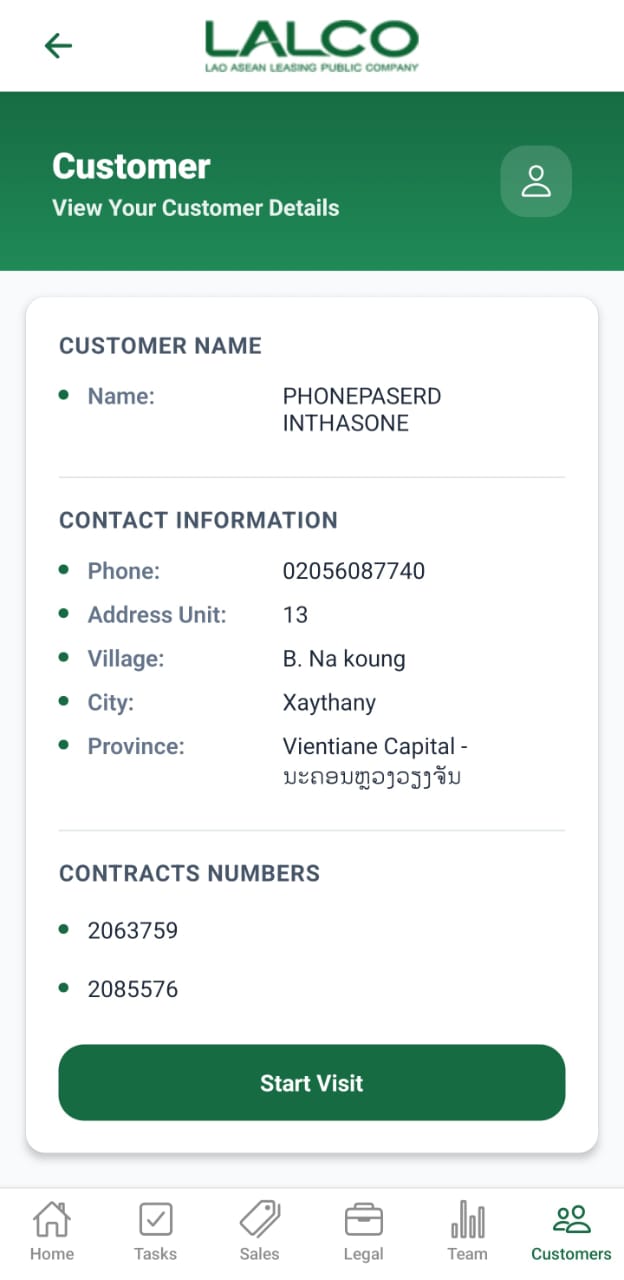
The Customer Details Screen shows detailed information about a selected customer and allows staff to start visits or update records.
Customer Details Section
Displays key information:
-
Name → Customer Name
-
Phone Number → Contact number
-
Address → Unit, Village, City, Province
-
Contract Numbers → Linked contracts
Actions
Start Visit
Used to begin a field visit related to the customer.
Used for:
-
Customer visits
-
Payment follow-ups
-
Field verification
How to Use
View Details
-
Select a customer from the list
-
Review all details
Start Visit
-
Tap Start Visit
-
Proceed with visit
-
Update visit remarks, GPS location, payment status if needed
Navigation
Customers Screen → Select Customer → Customer Details Screen → Start Visit
Add Visit Result Screen
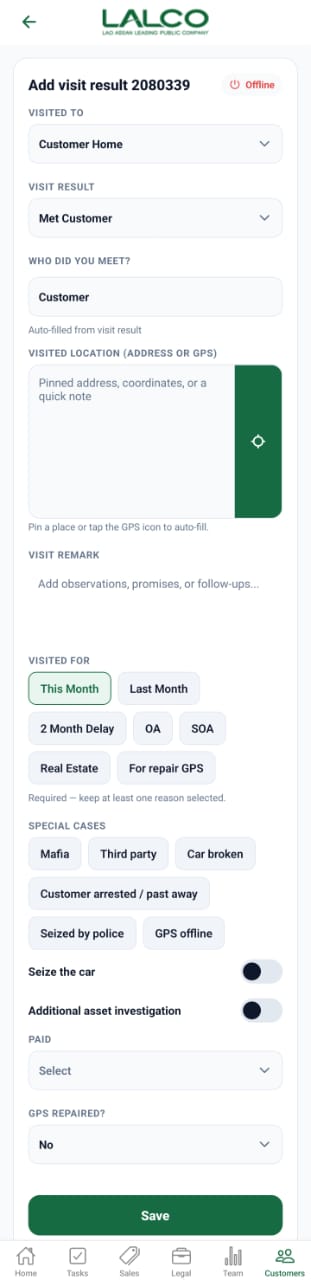
The Visit Result Screen allows staff to record the outcome of a customer visit, including visit details, GPS location, remarks, and status updates.
Visit Details Section
Visited To
-
Select where the visit occurred (e.g., Customer Home)
Visit Result
-
Choose the result of the visit (e.g., Met Customer, Not Available)
Who Did You Meet
-
Auto-filled or manually selected
Location Section
Visited Location
-
Enter address manually OR
-
Tap GPS icon to auto-fill current location
Tip: Always use GPS if possible for accurate tracking
Remarks Section
Visit Remark
-
Free text notes about the visit
(Example: “Customer promised to pay next week”)
Visit Reason Section
Select at least one reason for the visit:
-
This Month
-
Last Month
-
2 Month Delay
-
OA / SOA
-
Real Estate
-
GPS Repair
Special Cases Section (Optional)
Select only if applicable:
-
Third Party
-
Car Broken
-
Customer Arrested / Passed Away
-
Seized by Police
-
GPS Offline
Additional Options
-
Seize the Car → Toggle ON if the vehicle was seized
-
Additional Asset Investigation → Toggle ON if required
Payment & GPS Status
-
Paid → Select payment status
-
GPS Repaired → Yes / No
How to Use
Record Visit
-
Tap Start Visit from Customer Details Screen
-
Fill all required fields
-
Add GPS location and remarks
-
Select reasons for visit
-
Update special cases and additional options if needed
-
Tap Save
Navigation
Customer Details Screen → Start Visit → Visit Result Screen → Save
Add New Customer Screen
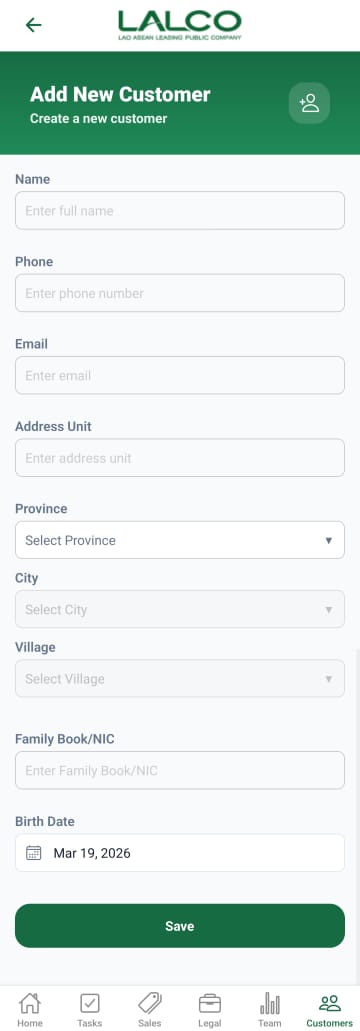
The Add New Customer Screen allows staff to create and register a new customer in the system. This information is used for managing customer records, loans, and follow-up activities.
Header Section
Page Title
Add New Customer
Description
Customer Information Form
Users must fill in the following details:
Name
Enter the customer’s full name.
Example:
Phone
Enter the customer’s contact number.
Example:
Enter the customer’s email address (optional if not available).
Example:
Address Unit
Enter the customer’s address or house/unit details.
Province
Select the province from the dropdown list.
City
Select the city based on the chosen province.
Village
Select the village or local area.
Family Book / NIC
Enter the customer’s identification number.
Example:
Birth Date
Select the customer’s date of birth using the date picker.
Example:
Action Button
Save
Tap Save to create the new customer.
-
If all required fields are filled correctly, the customer will be added successfully.
-
If there are missing or invalid details, the system may show an error.
How to Use
Add a New Customer
-
Open the Customers tab
-
Tap Add New Customer
-
Fill in all required details
-
Tap Save
-
Customer will be added to the system
Navigation