
Note Details Screen
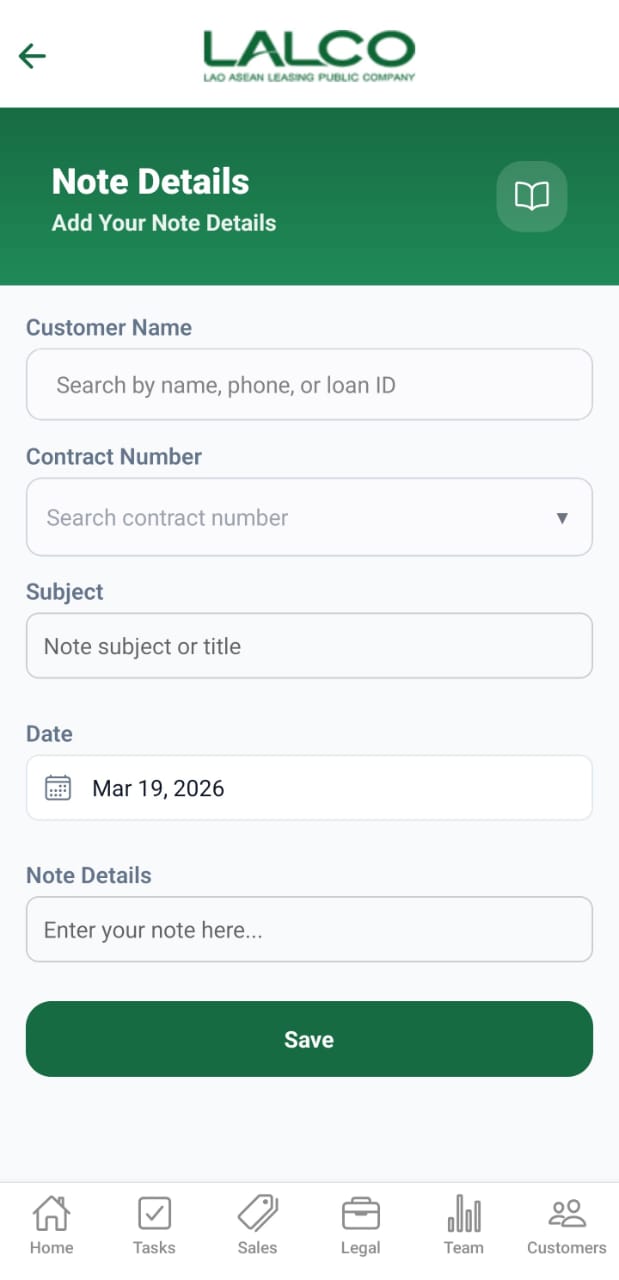
Overview
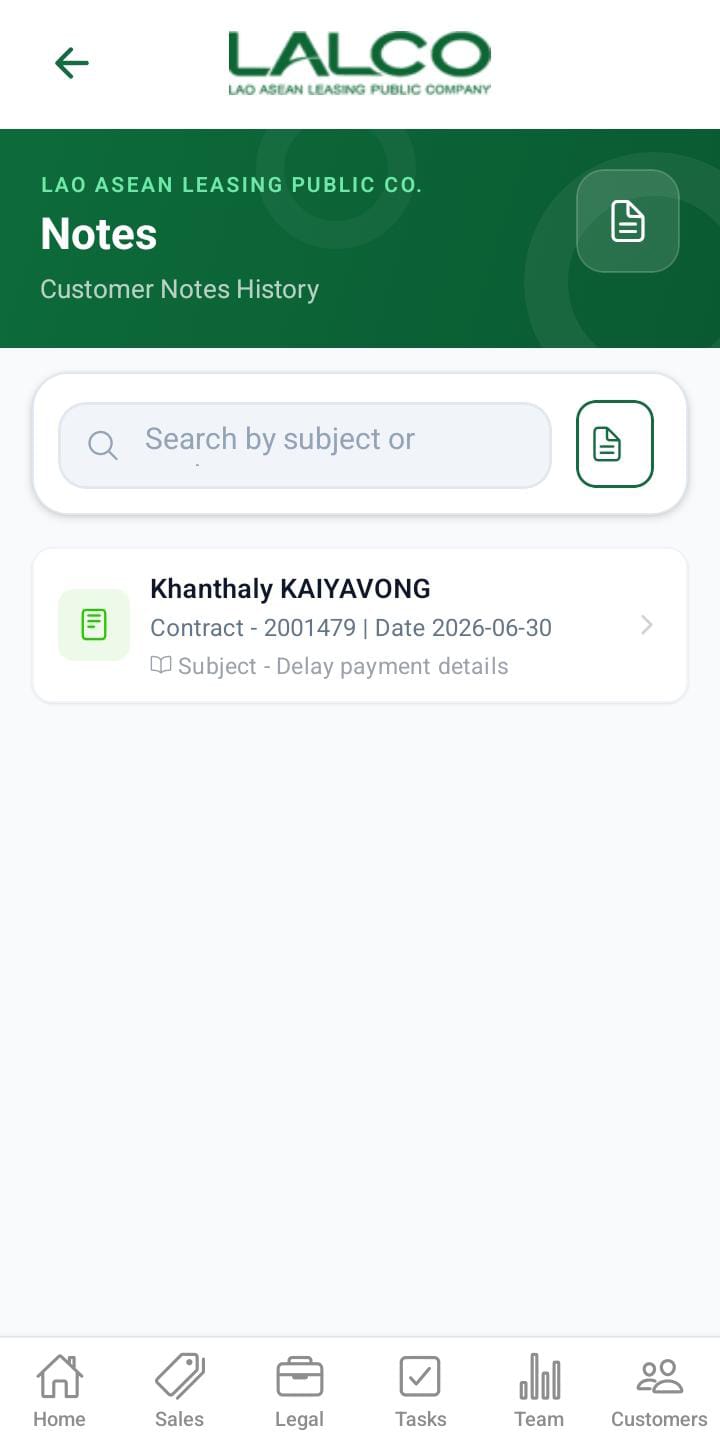
The Note Details Screen allows staff to create and save notes related to customers, contracts, and follow-ups. It helps track important interactions and maintain proper records.After adding the note details, the note list will be updated
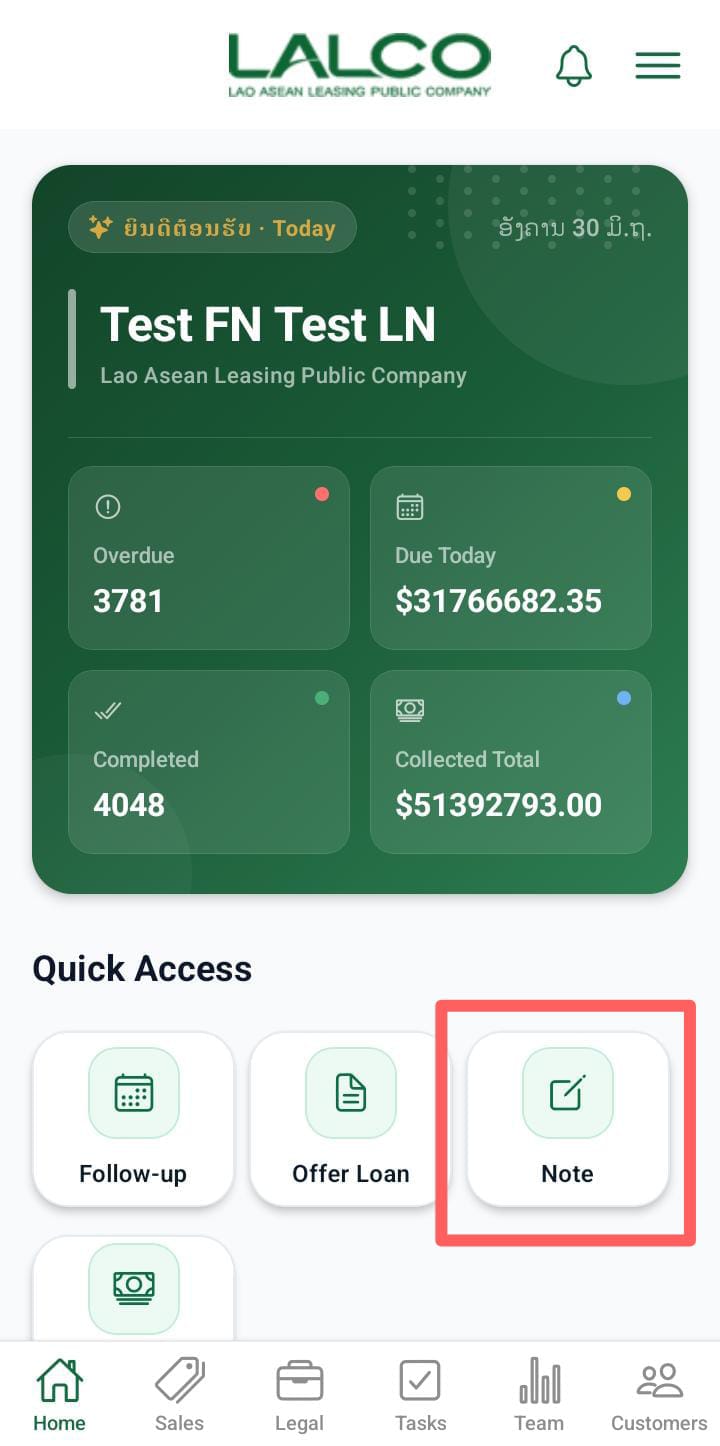
Access Path
Note Details Adding Form
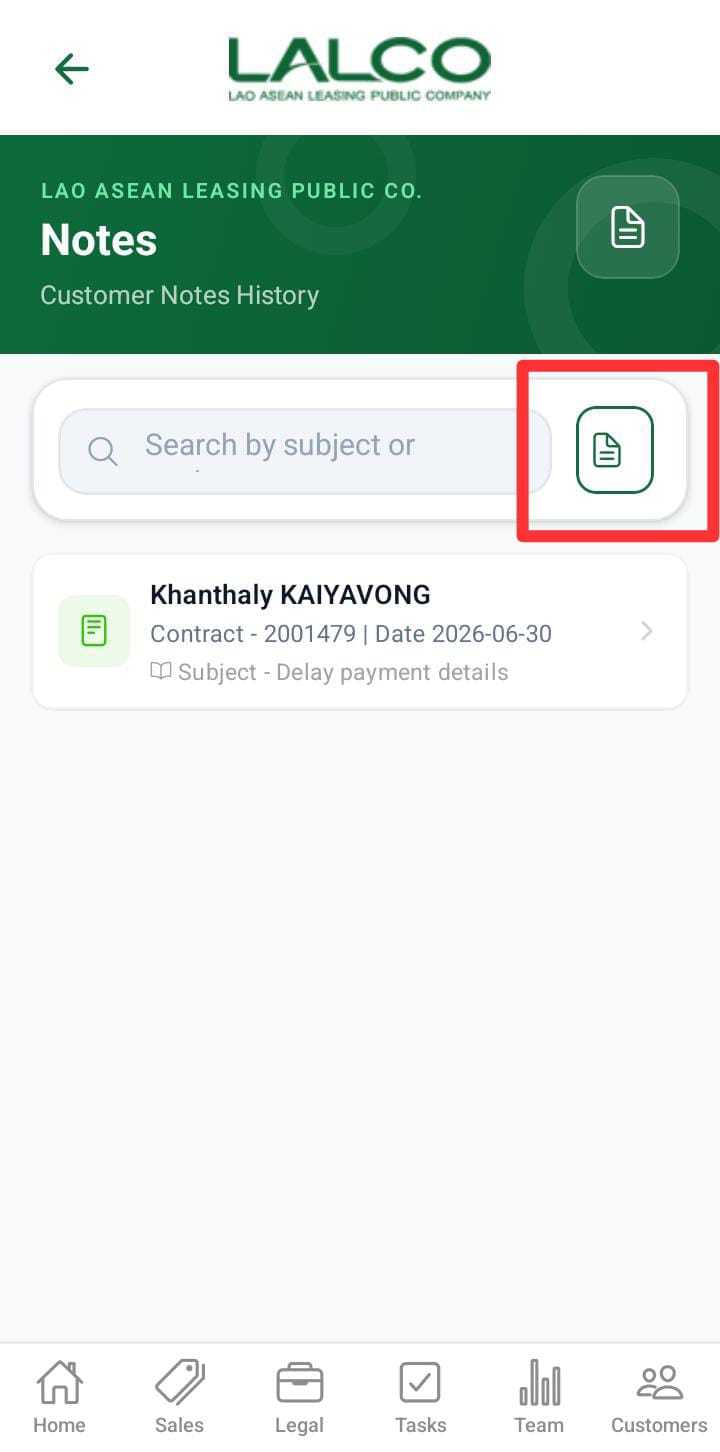
After clicking this icon, the user can navigate to the note adding screen.
Overview
Provides input fields to create a new note linked to a customer and contract.
Header Section
Page Title
The user must complete and submit the above form to create a note. When the user starts typing a customer name in the NoteCustomer DetailsName field, a list of matching customers is displayed, allowing the user to select the appropriate customer. After selecting the customer, the user must select the corresponding contract number.
Description
Book Icon 📖
Represents note/document management
Input Fields
1. Customer Name
-
Search and select a customer
-
Supports:
-
Customer name
-
Phone number
-
Loan ID
-
2. Contract Number
-
Dropdown or searchable field
-
Links note to a specific contract
3. Subject
-
Short title describing the note
4. Date
-
Default is current date
-
May be editable
5. Note Details
-
Main content of the note
-
Used for:
-
Call summaries
-
Customer updates
-
Follow-up actions
-
Action Button
Save Button
-
Label: Save
-
Function:
-
Stores the note
-
Links it to the selected customer and contract
-
How to Use
Create a Note
-
Open Note Details
-
Search and select a Customer
-
Select Contract Number
-
Enter a Subject
-
Verify or update the Date
-
Enter detailed information in Note Details
-
Tap Save
Validation Rules (Recommended)
-
Customer selection is required
-
Contract number is required
-
Subject should not be empty
-
Note details must
containnotmeaningfulbecontentempty
Success State
Error States
💡 Tip:
Use notes immediately after calls or customer visits to ensure accurate tracking and better follow-up management.