
Adding a New Issue
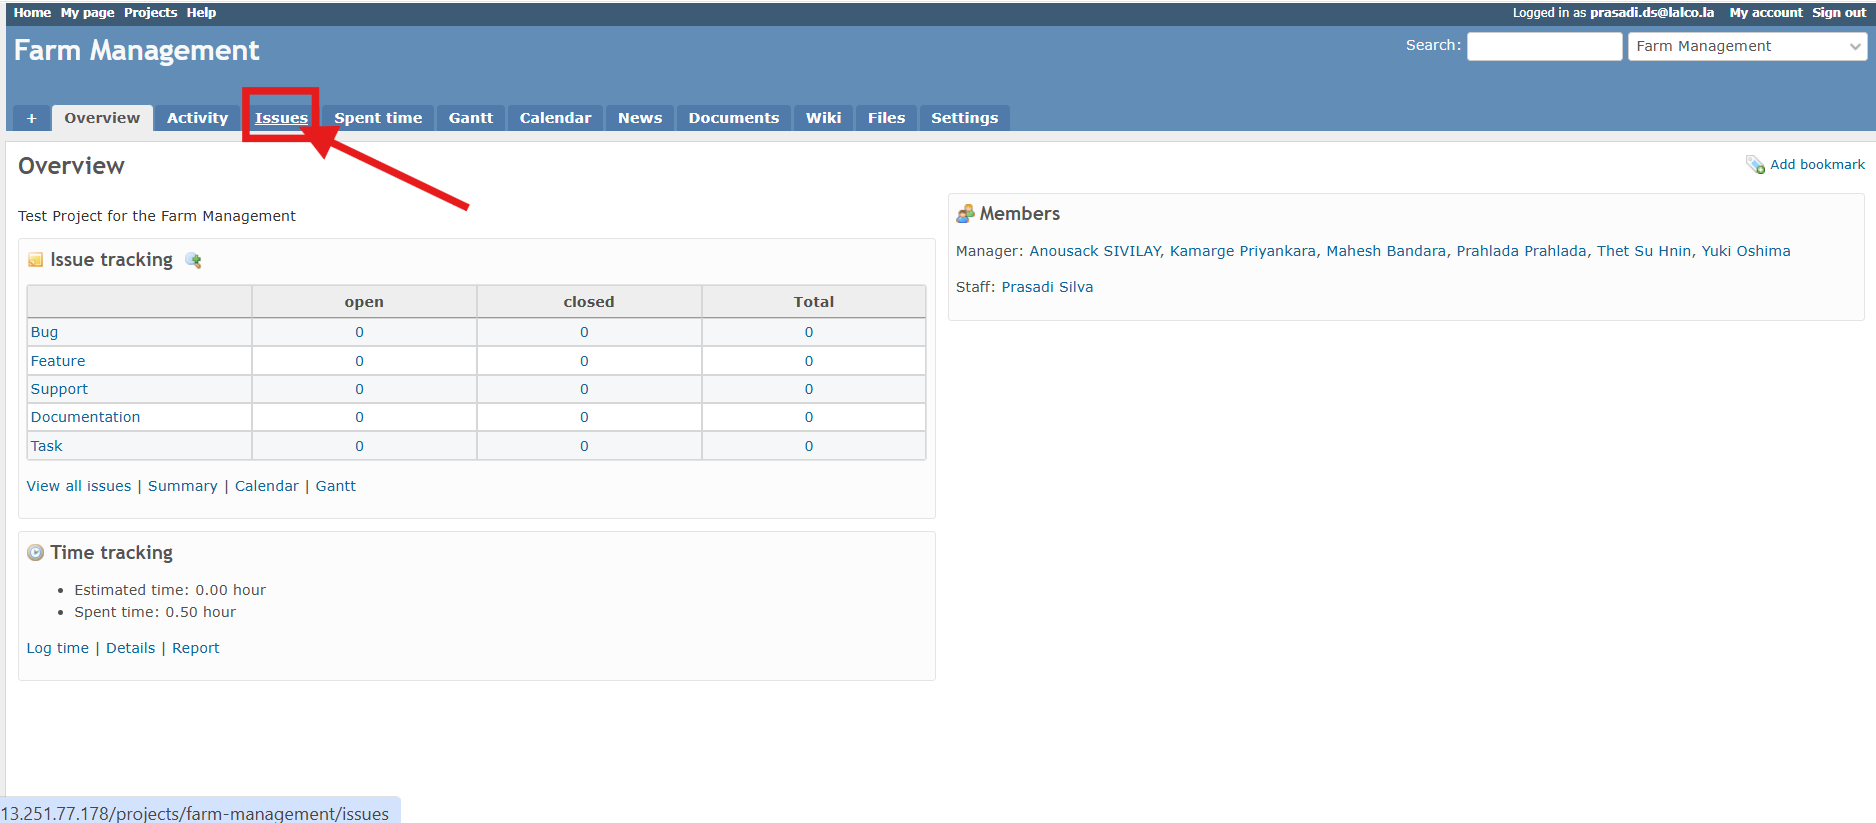
If you are not already there, select your desired project (in this case, "Farm Management") from the "Projects" list or the "Jump to a project..." dropdown. Then, click on the "Issues" tab in the project level navigation menu.
Adding a new issue
People can create a new issue when they meet the roles and permissions configured by the Redmine Administrator
(Role: Issue Tracking > Add Issues).
When creating a new issue, one of the most important items is the tracker field, which defines the nature of the issue. By default, Redmine comes with three different trackers: bug, feature, and support.
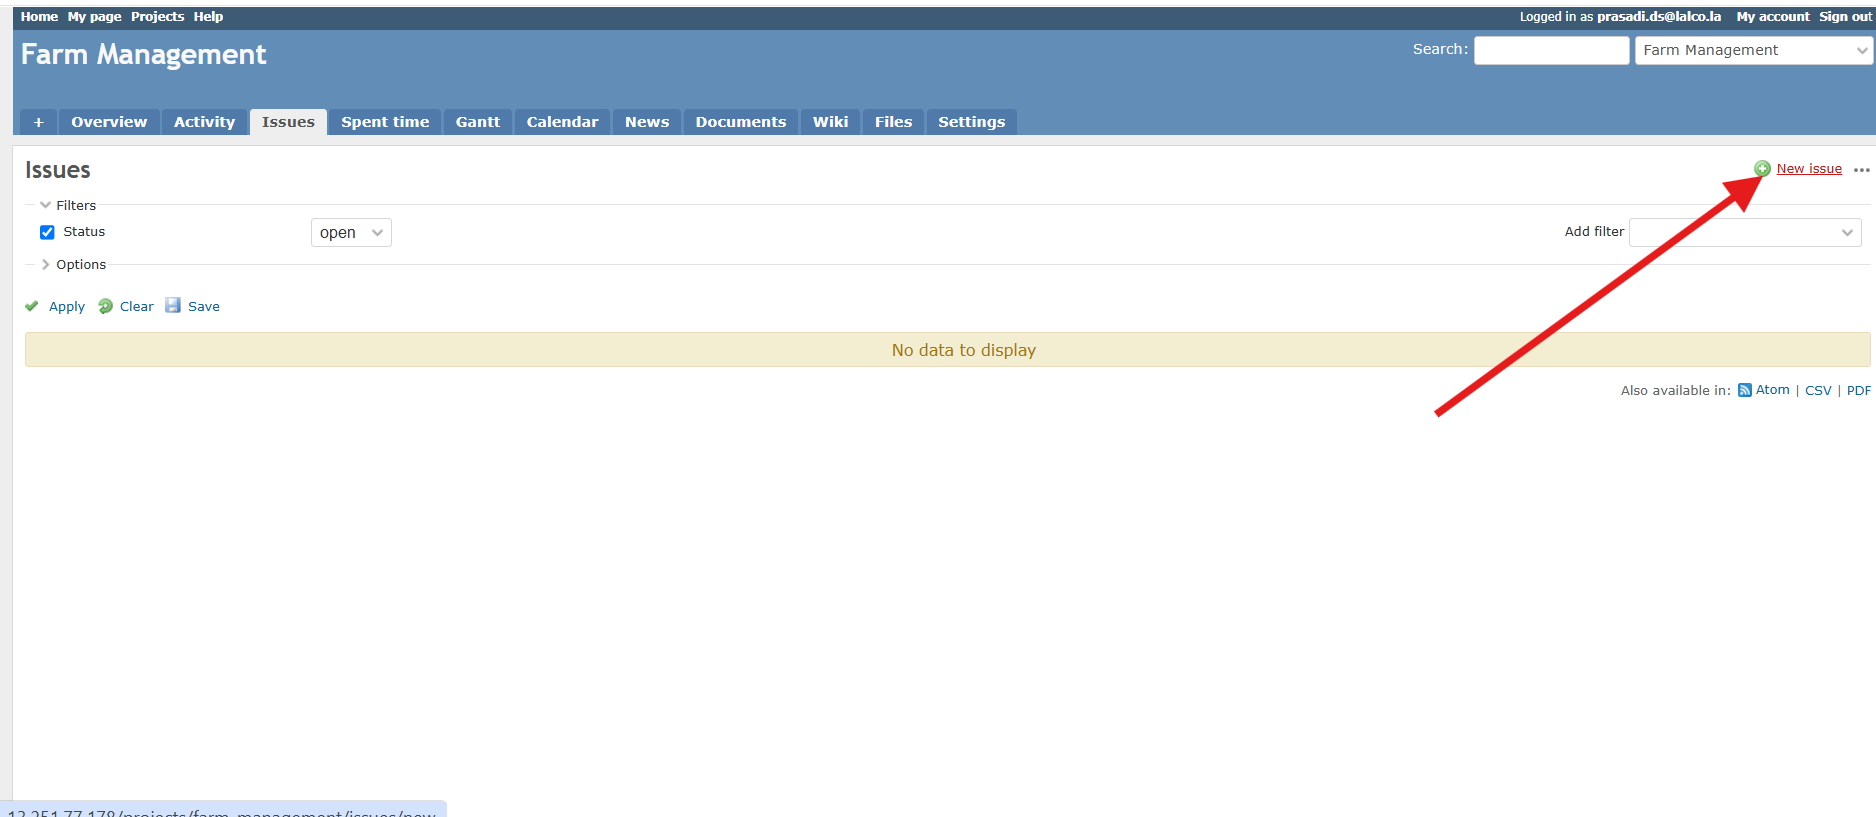
Click the "New issue" Button
On the "Issues" page, locate the "New issue" button. It's typically in the upper right corner of the issue list, as indicated by the red arrow in your image. Click this button.
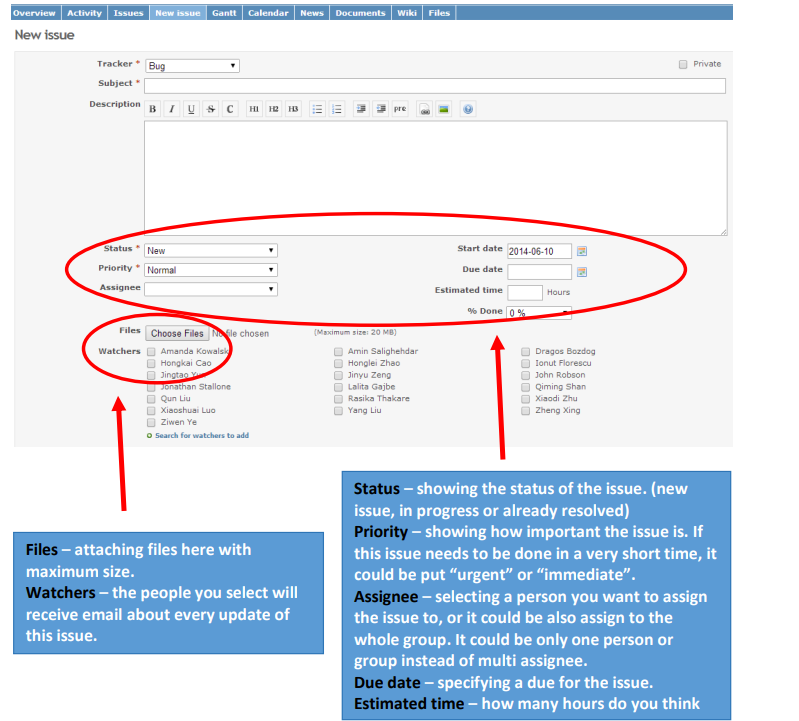
Fill out the "New issue" Form
-
Tracker (Pre-selected): The "Tracker" field is likely already selected as "Bug" based on your previous action or the default setting. If you need to change it, use the dropdown menu to choose a different issue type (e.g., Feature, Support, Task).
-
Subject ( Required):* In the "Subject" field, type a concise and descriptive title for this issue. This should briefly summarize the problem, request, or task.
For example, "Login button not working," or "Implement new report feature." -
Description: In the large "Description" text area, provide a detailed explanation of the issue. Include:
- Steps to reproduce: If it's a bug, clearly outline the steps someone can take to see the problem.
- Expected behavior: Describe what should happen.
- Actual behavior: Describe what is actually happening.
- Context: Any other relevant information that might help in understanding or resolving the issue.
-
Status (Pre-selected): The "Status" field is likely set to "New" by default. You usually don't need to change this when creating a new issue.
-
Priority ( Required):* Use the "Priority" dropdown menu to select the level of urgency or importance for this issue
(e.g., Low, Normal, High, Urgent). -
Assignee: If you know who should be responsible for this issue, select their name from the "Assignee" dropdown menu. If you're unsure, you can leave it blank.
-
Parent task: If this issue is a subtask of another existing issue, you can enter the ID number of the parent task here.
-
Start date: You can optionally set a "Start date" for when work on this issue should begin. The current date (05/16/2025 in your image) is pre-filled. You can change it using the calendar icon.
-
Due date: If this issue has a deadline, set the "Due date" using the calendar icon or by manually entering the date.
-
Estimated time: You can optionally enter an estimate of how many "Hours" you think it will take to resolve this issue.
-
% Done: This field is usually left at "0%" when creating a new issue. It will be updated as progress is made.
-
Additional Assignees: This section allows you to add other project members who are also working on or responsible for this issue. You can select names from the list and click the ">>" button to add them.
-
Files: If you have any relevant files (screenshots, documents, log files, etc.), click the "Choose Files" button to select them from your computer. Once selected, the file name will appear next to the button. Note the maximum file size limit mentioned.
- Choose an Action: At the bottom of the form, you have two main options
Create: Click this button to save the new issue and be redirected to the detailed view of the issue.
Create and add another: Click this button to save the current issue and immediately open a new, blank "New issue" form, pre-filled with the same project. This is useful if you have multiple related issues to create.
- Once you have entered all the necessary details into the form, proceed by clicking the "Create" button to submit the new issue.

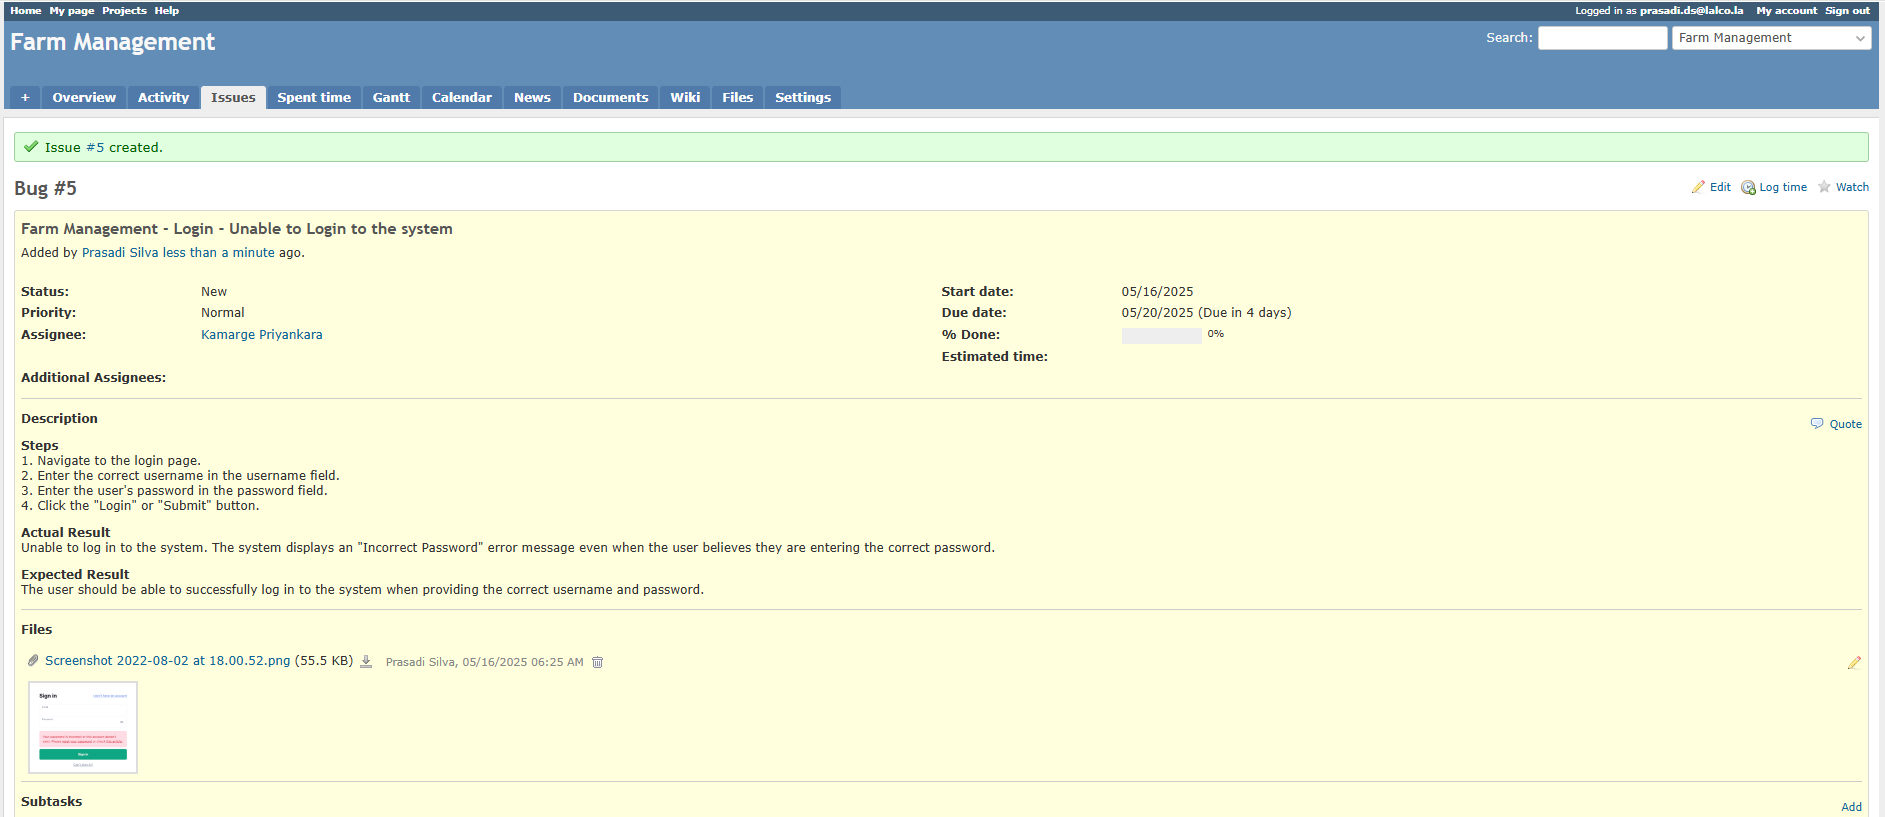
Created Bug
That you've created the bug report display as below
- At the top, you see a green banner confirming "Issue #5 created." This indicates that your bug report has been successfully saved.
- If you assigned the bug to someone, they will typically receive an email notification (depending on the project's notification settings). You might also want to verbally inform them of the new issue, especially if it's urgent.
- Use the comment box at the bottom of the page to provide updates, ask questions, or share new information related to the bug. Click "Add" to save your comment.
- After clicking “Issues”, a list of open issues will show up. In the list, there will be updated time, author &assignee, priority, status, and subject of each issue. By clicking the subject of the issue, you are able to enter the issue and see the description & update details.

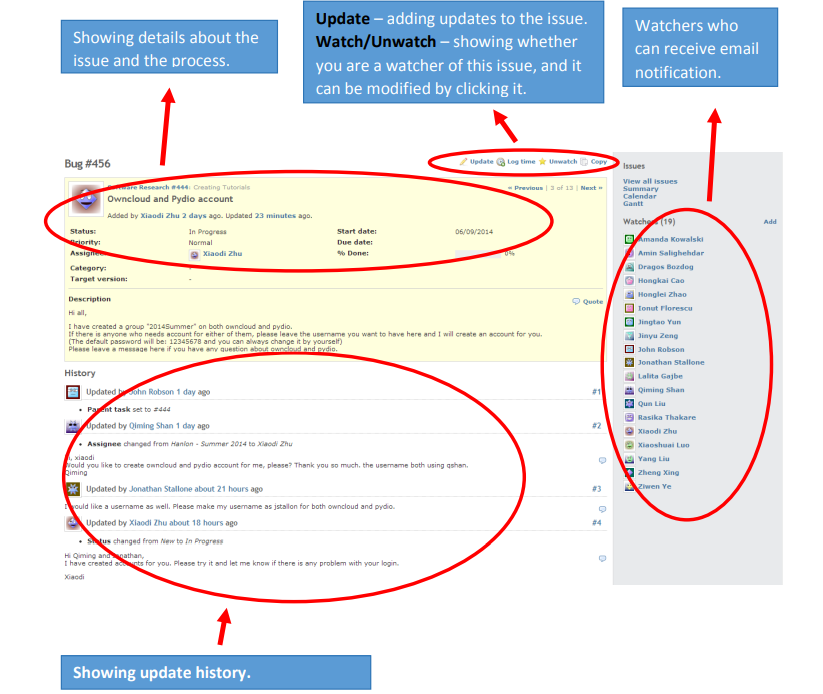
- In an issue, after clicking “Update”, a section will show up which allows the user to enter details.
- In this section, you are able to change the properties of the issue (e.g., how many percentage has been done, assignee changing, etc.).
- The “Log time” section lets users record how many hours have been spent on this issue. Uploading an attachment is also allowed.
- After you finish the update and submit it, watchers will receive an email about the updates, and people can always check the update history under this issue