
Pipelines in Jenkins
Jenkins Pipelines are a powerful way to automate the software development lifecycle by defining CI/CD workflows as code. They allow you to automate tasks like building, testing, and deploying applications in a structured, repeatable, and scalable manner. Pipelines provide visualization of the workflow stages, support complex scenarios with branching and parallel execution, integrate easily with other tools, and enhance consistency, reliability, and speed in the delivery process, reducing manual errors and increasing efficiency.
Creating a simple pipeline
To create a simple pipeline go to the repository directory and create a text file named "Jenkinsfile". Inside the file copy and paste the below groovy script. This is a simple groovy script which prints some statements in each stage of the build.
pipeline {
    agent any

    stages {
        stage('Build') {
            steps {
                echo 'Building the Application...'
            }
        }
        stage('Test') {
            steps {
                echo 'Testing the Application ...'
            }
        }
        stage('Deploy') {
            steps {
                echo 'Deploying the Application...'
            }
        }
    }
}
Now check status of jenkins using the following command.
$ sudo systemctl status jenkinsif it is active then go to jenkins running url (default is localhost:8080). if it is not active run the following command and start jenkins.
$ sudo systemctl start jenkins- After logging in go to Dashboard/ new item and create a multibranch pipeline.
- Click add source and paste the git url. (use this if you don't have one: https://github.com/ransika99lalco/my-app.git)
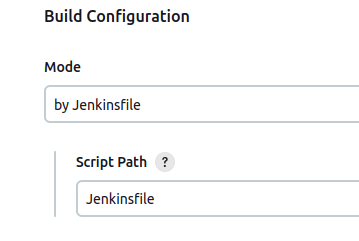
- Build configuration should look like below:
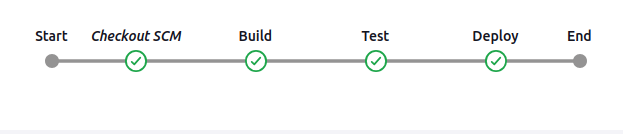
- Click save and run build. In the stages, you should see something like this.
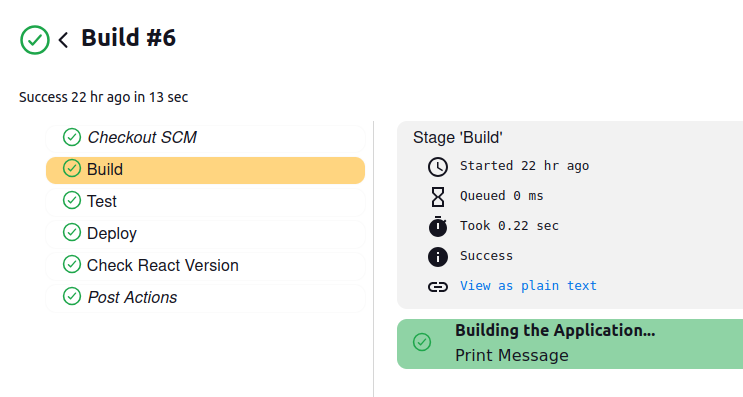
- When you click on each stage you can see the print statements being printed as below.
No Comments