
Bank Statement
1. Introduction
This document outlines the process of uploading and processing bank statements within our system. The primary goal is to automate the linking of bank statements to existing collections and create new auto-collections as needed.
2. Adding Bank Statements
There are two methods to Add bank statements:
2.1 Manual Add
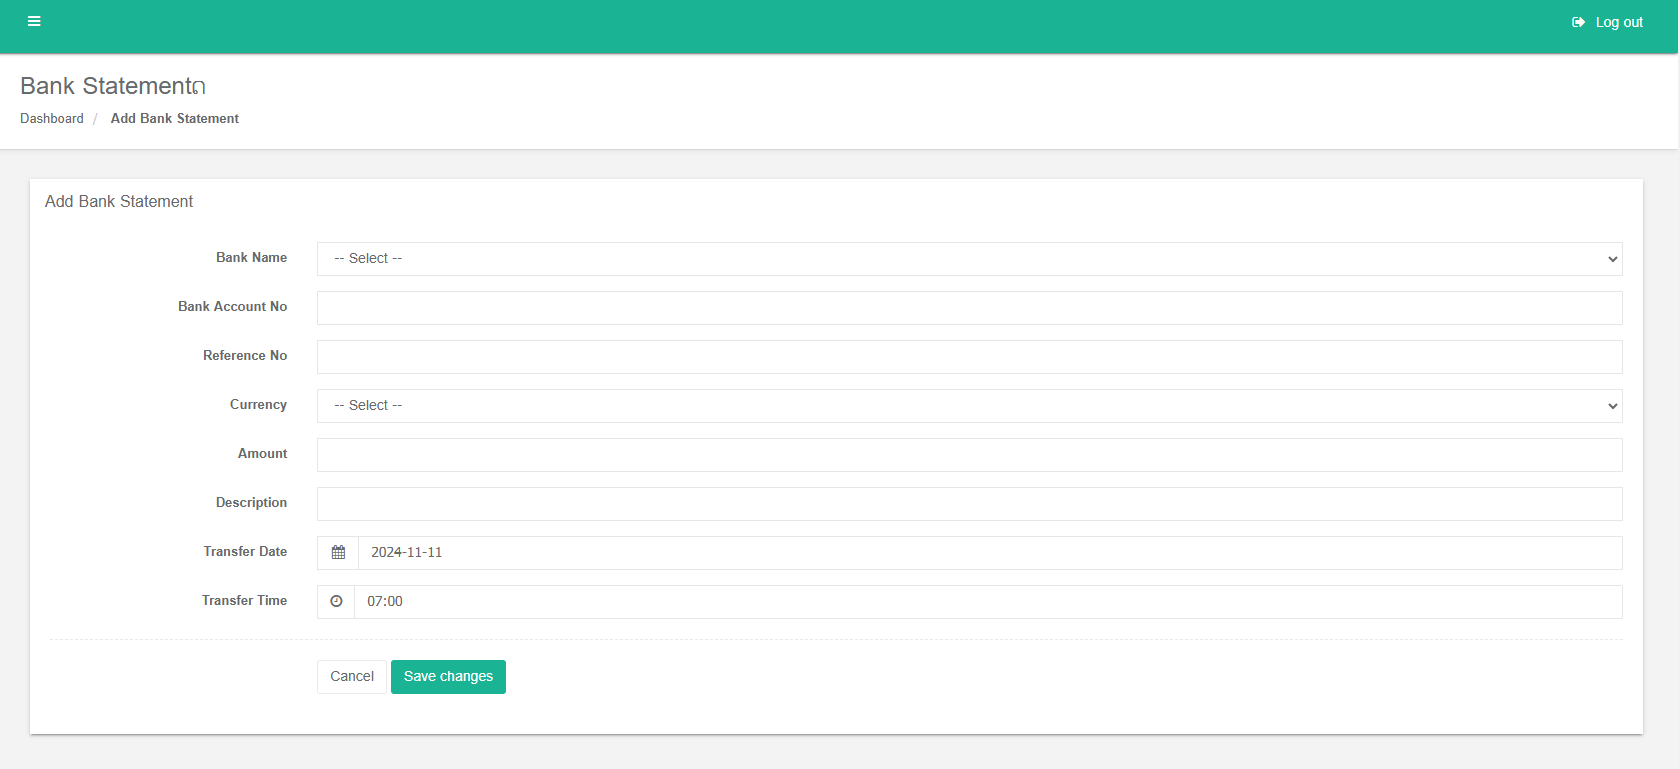
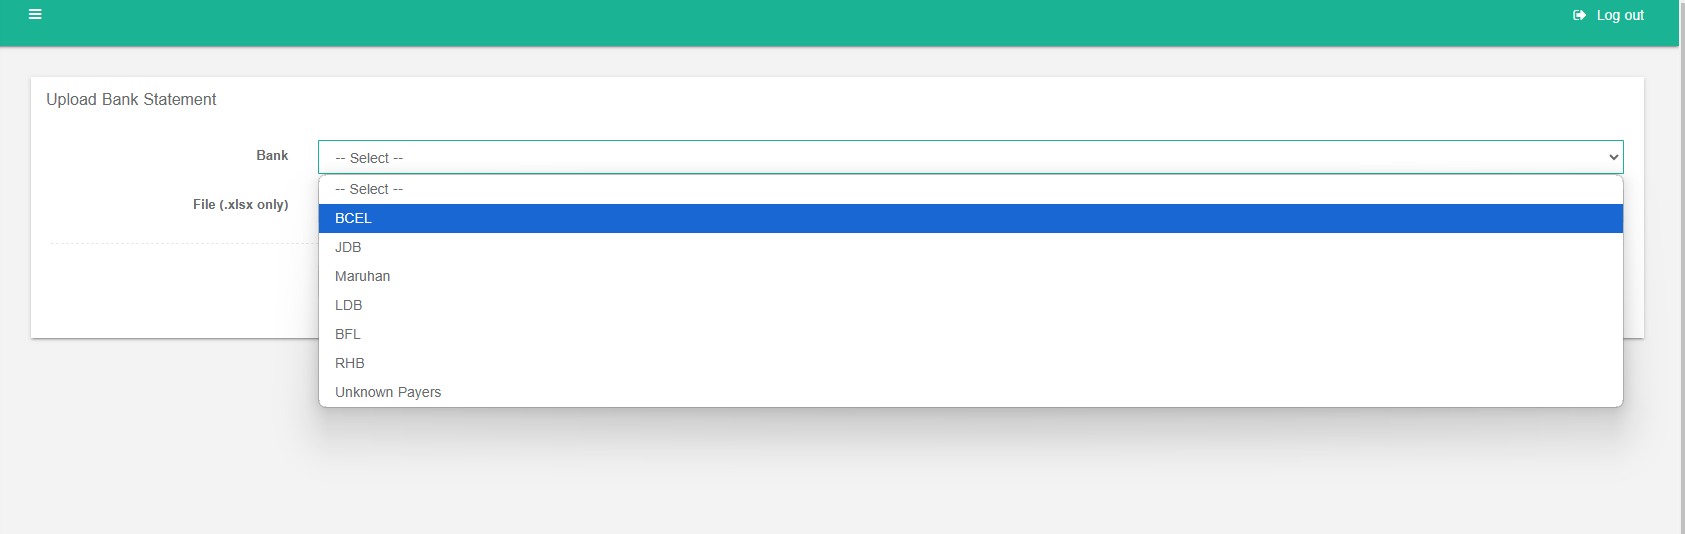
2.2 Upload Bank Statement
Once a bank statement is uploaded, the system automatically performs a series of checks to identify and link transactions to existing collection receipts. The following criteria are used to match transactions:
- Contract Number: The transaction must match an existing contract number.
- Date: The transaction date must match the date on the contract or collection receipt.
- Currency: The transaction currency must match the contract or collection receipt currency.
If a transaction meets all three criteria, it is successfully linked to the matching collection receipt.
- No Matching Collection:
- If no matching collection is found, an auto-collection will be created for the statement.
- The auto-collection will be automatically approved and it is successfully linked to the matching collection receipt.
3. Bank Statement Page(Credit/ Debit)
The Bank Statement page provides a comprehensive overview of all bank statements uploaded or manually entered into the system. It offers several search filters to help users locate specific statements efficiently:
Search Filters:
- Date Range (Transfer)
- Date Range (Statement)
- Date Range (Date Created)
- Account Number
- Bank(BCEL, JDB, Maruhan, LDB, BFL, RHB)
- Bank Statement ID
- Reference Number
- Description
- Contract Number.
- NCN
- Currency(USD, THB, LAK)
- Amount
- Status: Filters statements by their current status, which can be one of the following:
- Pending: The statement is awaiting processing.
- Pending Approval: The statement requires approval before processing.
- Allocated: The statement has been allocated to a specific contract or account.
- Removed: The statement has been removed from the system.
- Oracle Reversed: The statement has been reversed by the Oracle system.

Total Amounts
The page displays the total amount of all filtered statements in the following currencies:
-
-
- LAK
- USD
- THB
-

Bank Statement Table
The main table on the page lists all bank statements, providing detailed information about each transaction. Users can perform various actions on these statements:
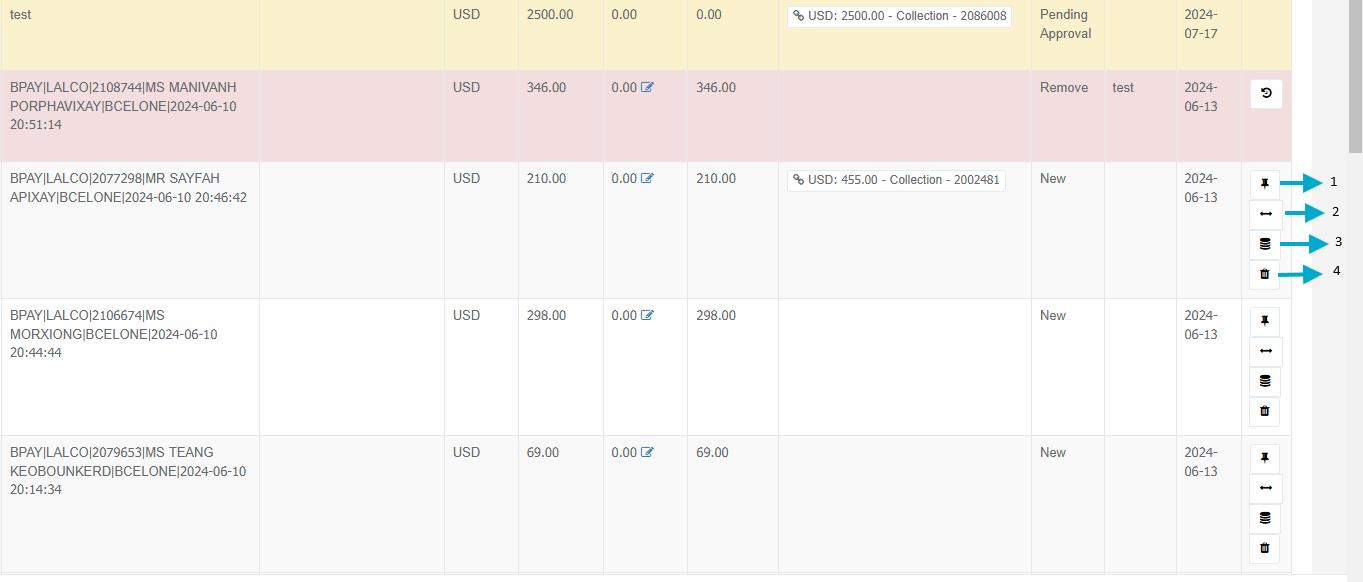
- Assign: Redirects to the Collection Receipt page to assign the statement to a specific collection receipt.
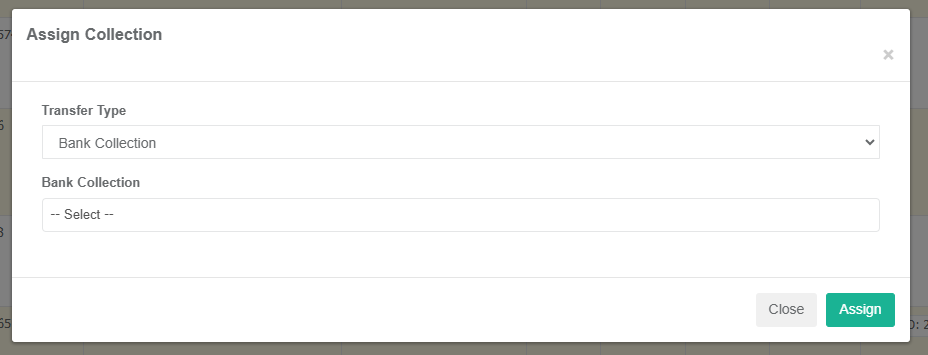
- Assign Collection: Opens a popup window to assign the statement to a bank collection.
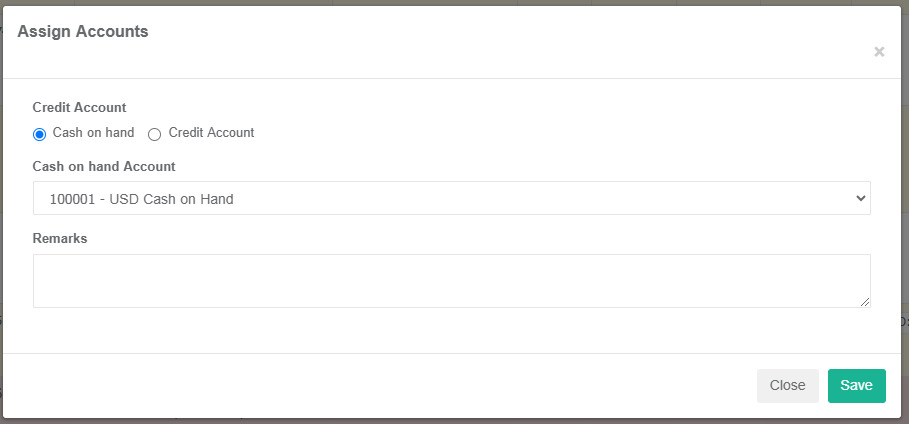
- Assign Account: Opens a popup window to assign the statement to a specific account.
- Delete: Removes the statement from the database.
Exporting Bank Statements
By utilizing these features and filters, users can effectively manage and analyze bank statements, ensuring accurate financial records and efficient processing.
No Comments